
Google Workspace costs $6/user/month. Microsoft 365 starts at $6/user/month. Fastmail is $5/month. For a single founder or small team, that’s $72-144/year just to send emails from [email protected] instead of [email protected].
But you probably already have a Gmail account and a domain on Cloudflare. With about 30 minutes of setup, you can send and receive emails from your custom domain through Gmail’s interface, for effectively free.
The setup uses three pieces:
- AWS SES for sending (pennies per thousand emails)
- Cloudflare Email Routing for receiving (free)
- Gmail as your email client
No new apps, no new interfaces, just your existing Gmail with a custom “From” address.
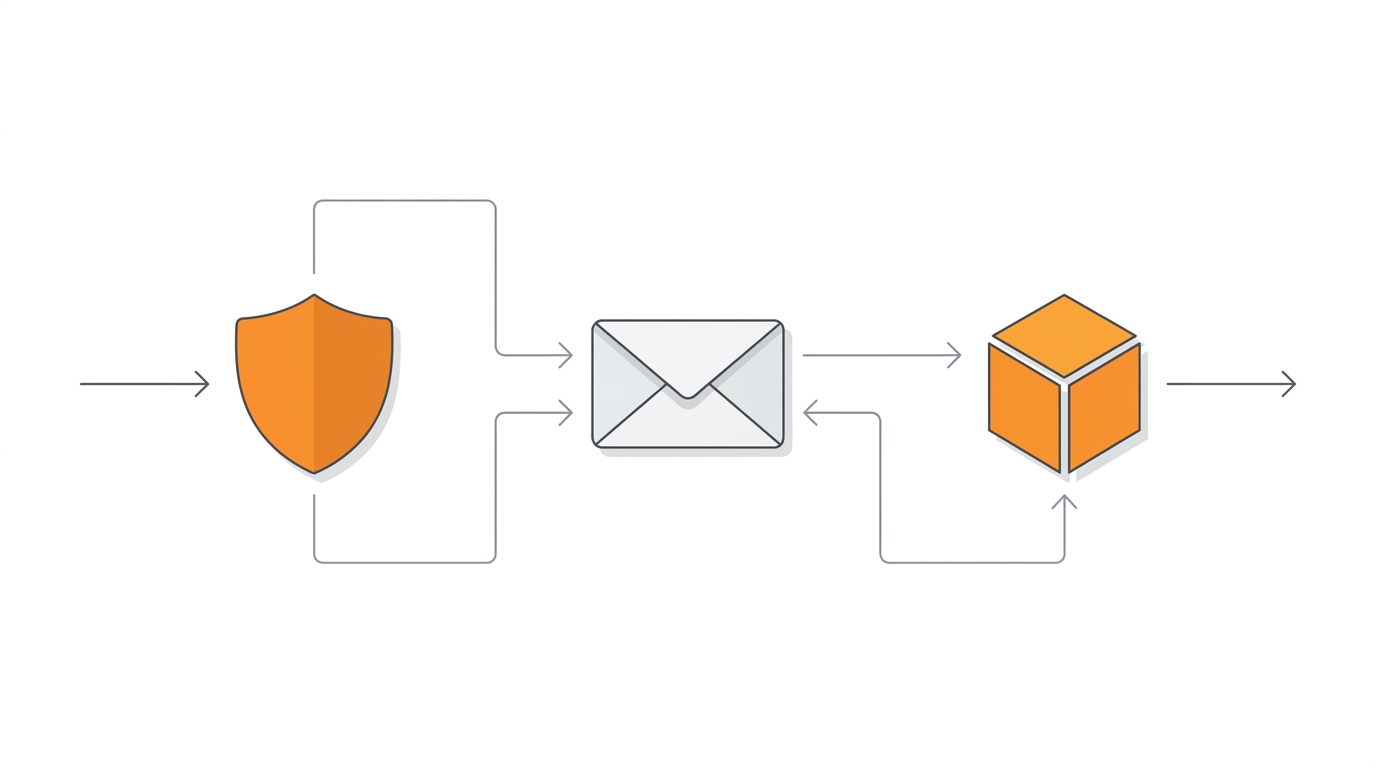
The Architecture
When someone emails [email protected], Cloudflare catches it and forwards to your Gmail. When you reply, Gmail routes through AWS SES, which sends it from your custom domain with proper authentication (DKIM, SPF, DMARC). The recipient sees [email protected] in their inbox.
Let’s set it up.
Part 1: Sending Emails with AWS SES
Creating a Domain Identity
First, we need to verify your domain with SES. This proves you own it and authorizes SES to send on its behalf.
Via AWS Console:
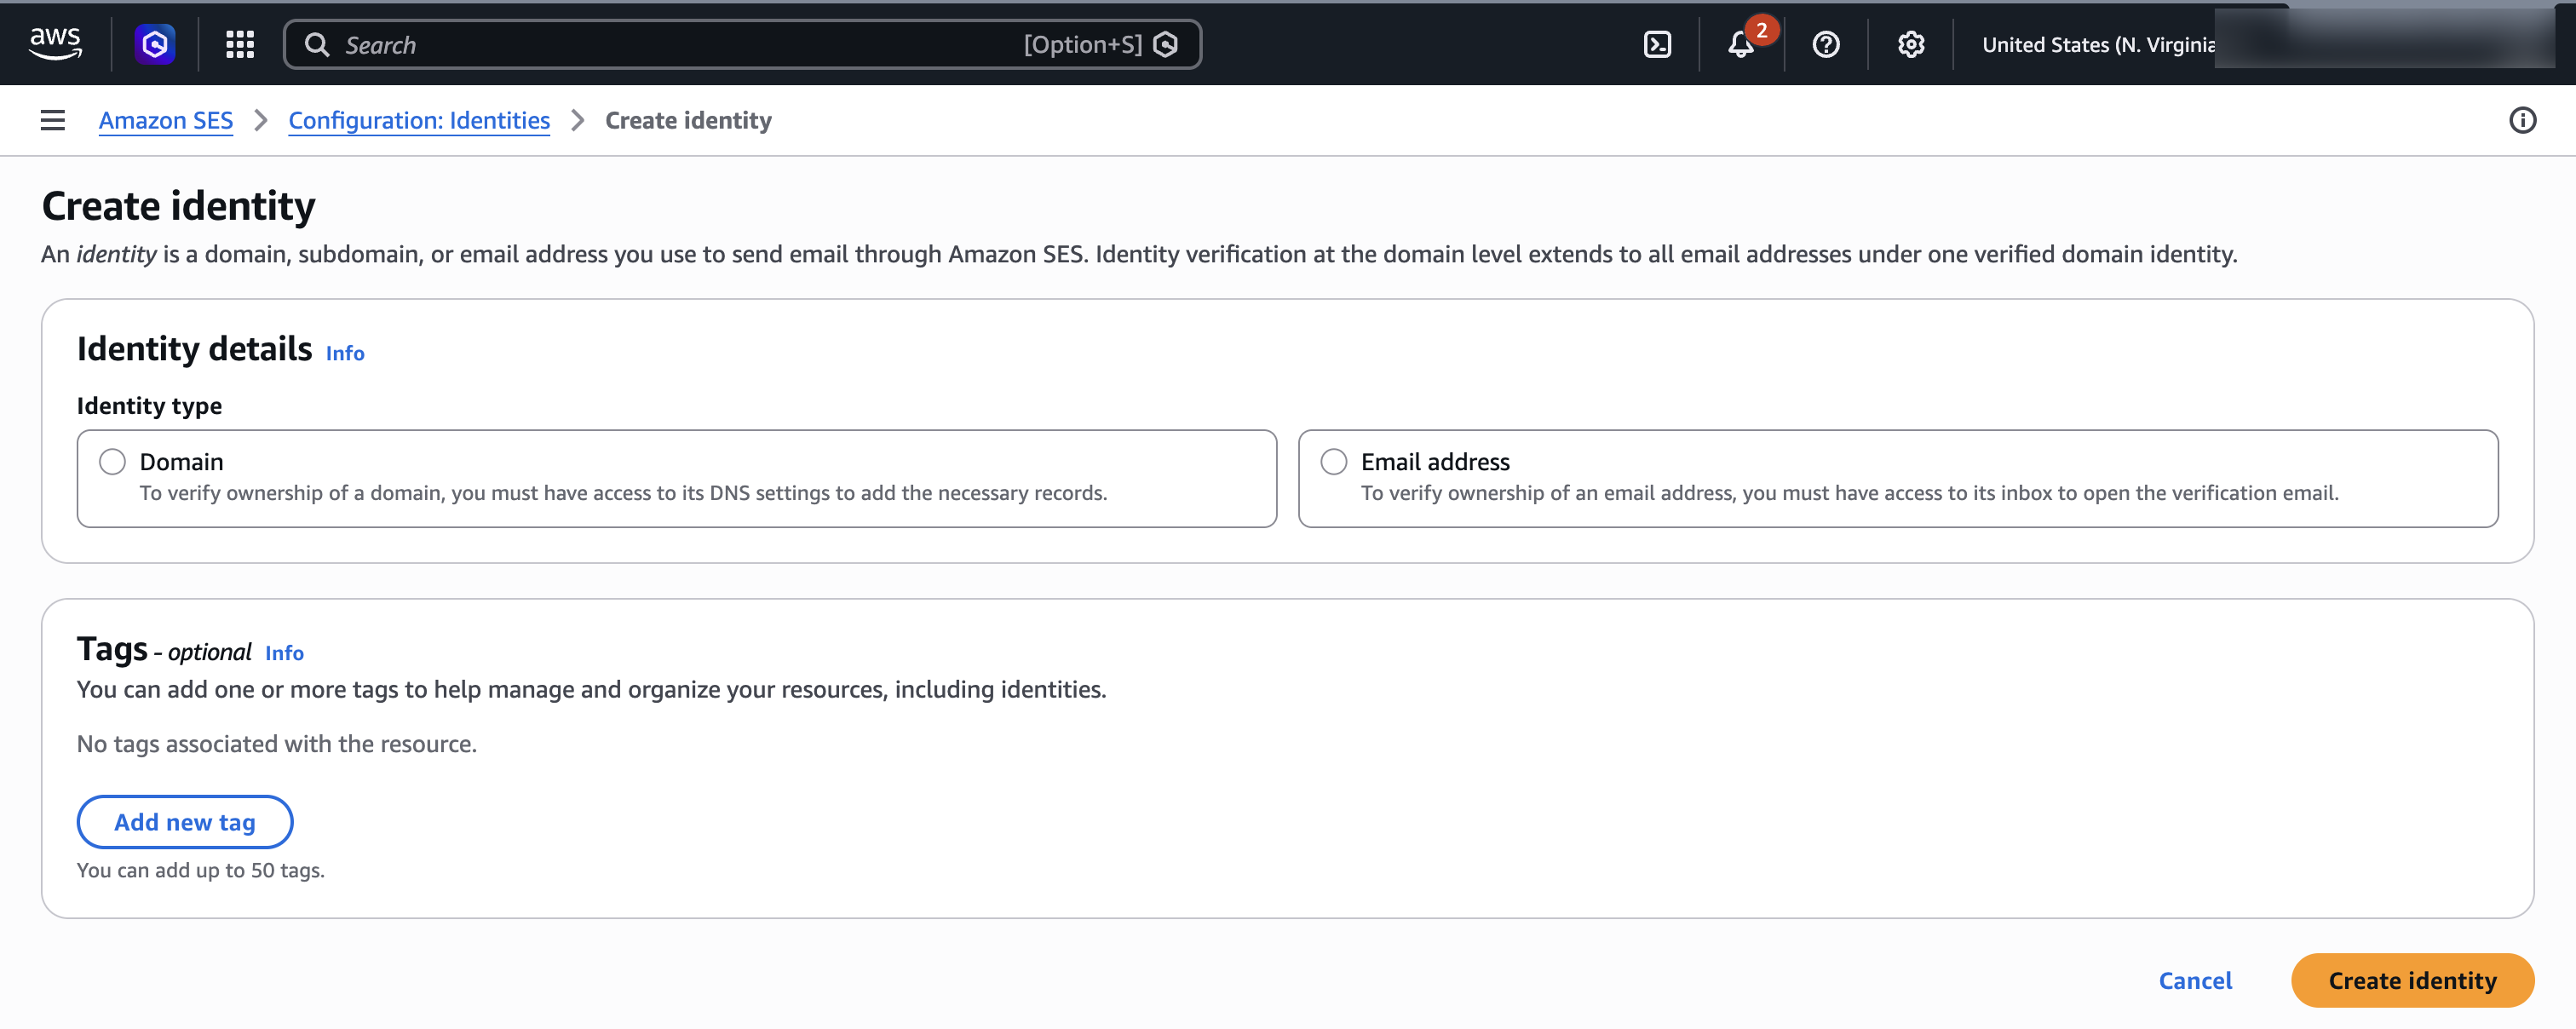
- Open the SES Console
- Go to Identities → Create identity
- Select Domain and enter your domain (e.g.,
yourdomain.com) - Leave DKIM settings as default (Easy DKIM, RSA 2048-bit)
- Click Create identity
Via CLI:
aws sesv2 create-email-identity --email-identity yourdomain.comThe response includes three DKIM tokens. These need to go into your DNS as CNAME records.
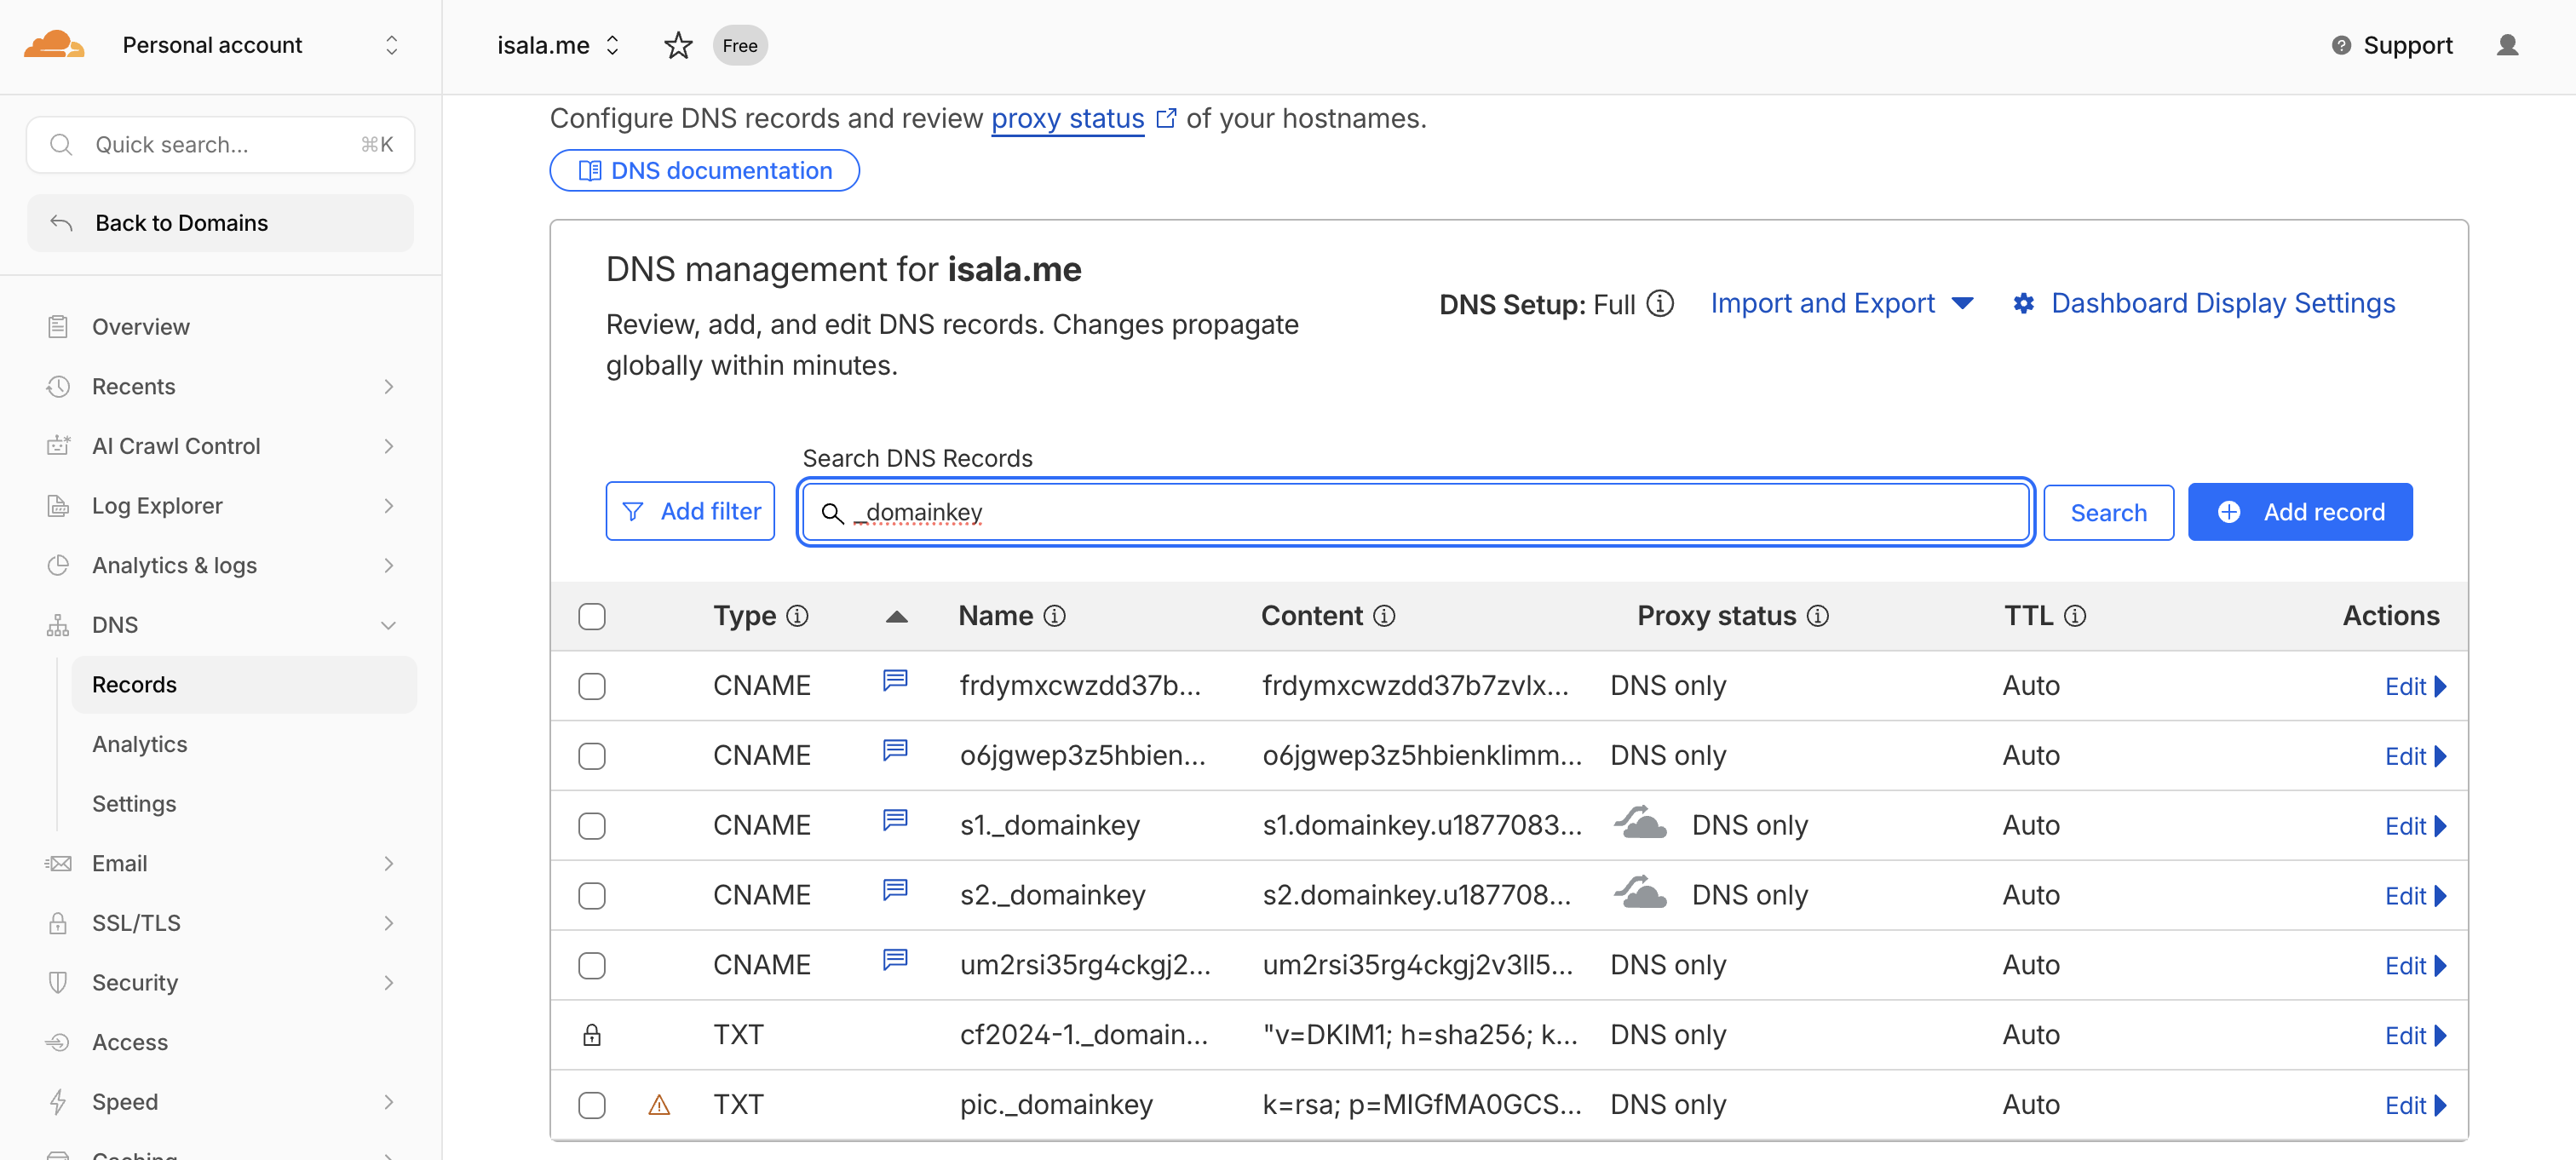
Adding DKIM Records to Cloudflare
SES gives you three DKIM tokens that look like random strings. Each becomes a CNAME record pointing to token.dkim.amazonses.com.
Via Cloudflare Dashboard:
- Go to your domain’s DNS settings
- Add three CNAME records:
| Type | Name | Target | Proxy |
|---|---|---|---|
| CNAME | token1._domainkey | token1.dkim.amazonses.com | DNS only |
| CNAME | token2._domainkey | token2.dkim.amazonses.com | DNS only |
| CNAME | token3._domainkey | token3.dkim.amazonses.com | DNS only |
Replace token1, token2, token3 with your actual tokens from SES.
Via Cloudflare API:
# Get your zone ID first
ZONE_ID=$(curl -s "https://api.cloudflare.com/client/v4/zones?name=yourdomain.com" \
  -H "Authorization: Bearer YOUR_CF_TOKEN" | jq -r '.result[0].id')

# Add each DKIM record
curl -X POST "https://api.cloudflare.com/client/v4/zones/$ZONE_ID/dns_records" \
  -H "Authorization: Bearer YOUR_CF_TOKEN" \
  -H "Content-Type: application/json" \
  --data '{
    "type": "CNAME",
    "name": "token1._domainkey",
    "content": "token1.dkim.amazonses.com",
    "proxied": false,
    "comment": "AWS SES DKIM"
  }'
After adding the records, SES will verify them automatically. Check the status:
aws sesv2 get-email-identity --email-identity yourdomain.com \
  --query 'DkimAttributes.Status'
Wait for SUCCESS. Usually takes 5-15 minutes.
Setting Up SPF
SPF tells receiving mail servers which IPs are allowed to send email for your domain. Without it, your emails are more likely to hit spam.
If you already have an SPF record, add include:amazonses.com to it:
v=spf1 include:_spf.mx.cloudflare.net include:amazonses.com ~allIf you don’t have one, create a TXT record at the root of your domain:
| Type | Name | Content |
|---|---|---|
| TXT | @ | v=spf1 include:amazonses.com ~all |
Custom MAIL FROM Domain
By default, SES sends emails with a return path like [email protected]. This creates a mismatch between your “From” address and the envelope sender, which can hurt deliverability.
Setting up a custom MAIL FROM domain fixes this and improves your spam score.
Via Console:
- In SES, go to your domain identity
- Click Edit in the Mail From domain section
- Enter a subdomain like
mail.yourdomain.com - Save
Via CLI:
aws sesv2 put-email-identity-mail-from-attributes \
  --email-identity yourdomain.com \
  --mail-from-domain mail.yourdomain.com
Then add these DNS records in Cloudflare:
| Type | Name | Content | Priority |
|---|---|---|---|
| MX | mail | feedback-smtp.us-east-1.amazonses.com | 10 |
| TXT | mail | v=spf1 include:amazonses.com ~all | - |
DMARC Record
DMARC ties SPF and DKIM together and tells receivers what to do with emails that fail authentication. Even a basic DMARC policy helps deliverability.
Add this TXT record:
| Type | Name | Content |
|---|---|---|
| TXT | _dmarc | v=DMARC1; p=none; rua=mailto:[email protected] |
The p=none means you’re just monitoring for now. Once you’re confident everything works, you can change it to p=quarantine or p=reject.
Requesting Production Access
New SES accounts start in “sandbox” mode where you can only send to verified email addresses. For actual use, you need production access.
Via Console:
- In SES, go to Account dashboard
- Click Request production access
- Fill out the form with your use case
Via CLI:
aws sesv2 put-account-details \
  --production-access-enabled \
  --mail-type TRANSACTIONAL \
  --website-url "https://yourdomain.com" \
  --use-case-description "Sending transactional emails and personal correspondence from my custom domain."
AWS typically approves these within 24 hours. You’ll get an email when it’s done.
Part 2: Connecting Gmail
Creating SMTP Credentials
Gmail needs SMTP credentials to send through SES. This requires creating an IAM user with SES permissions.
Via Console:
- Go to IAM Console → Users → Create user
- Name it something like
ses-smtp-gmail - Attach the policy
AmazonSESFullAccess(or create a minimal policy with justses:SendRawEmail) - Create the user, then go to Security credentials → Create access key
- Choose “Other” as the use case
- Save the Access Key ID and Secret Access Key
Now convert the secret key to an SMTP password. AWS has a specific algorithm for this. Save this script and run it:
#!/usr/bin/env python3
import hmac
import hashlib
import base64
import sys

REGION = "us-east-1"  # Change if using a different region
SECRET_KEY = sys.argv[1]

def sign(key, msg):
    return hmac.new(key, msg.encode('utf-8'), hashlib.sha256).digest()

signature = sign(("AWS4" + SECRET_KEY).encode('utf-8'), "11111111")
signature = sign(signature, REGION)
signature = sign(signature, "ses")
signature = sign(signature, "aws4_request")
signature = sign(signature, "SendRawEmail")

print(base64.b64encode(bytes([0x04]) + signature).decode('utf-8'))
Run it with your secret key:
python3 ses_smtp_password.py YOUR_SECRET_ACCESS_KEYThe output is your SMTP password.
Adding to Gmail
- Open Gmail → Settings (gear icon) → See all settings
- Go to Accounts and Import tab
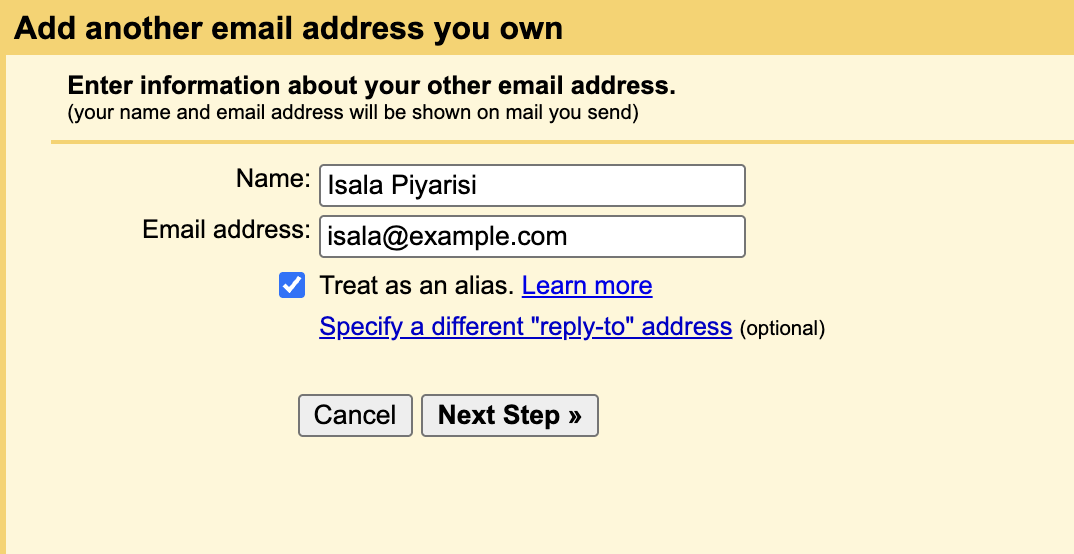
- Under “Send mail as”, click Add another email address
- Enter your name and custom email address (e.g.,
[email protected]) - Uncheck “Treat as an alias” if you want replies to go to this address specifically
- Click Next
- Enter SMTP settings:
- SMTP Server:
email-smtp.us-east-1.amazonaws.com - Port:
587 - Username: Your IAM Access Key ID
- Password: The SMTP password you generated
- Select TLS
- SMTP Server:
- Click Add Account
Gmail will send a verification email to your address. If you haven’t set up receiving yet, you’ll need to check SES or set up Cloudflare Email Routing first (next section).
Part 3: Receiving Emails with Cloudflare
Cloudflare Email Routing is free and handles incoming mail without needing to set up mail servers.
Enabling Email Routing
- In Cloudflare, go to your domain → Email → Email Routing
- Click Enable Email Routing
- Cloudflare will add the required MX records automatically

Creating Routes
Set up where incoming emails should go:
- Click Create address
- Enter the local part (e.g.,
hellofor[email protected]) - Set the destination as your Gmail address
- Save
You can create multiple addresses or use a catch-all to forward everything:
- Go to Routing rules → Catch-all
- Set action to Send to an email
- Enter your Gmail address
Now any email to *@yourdomain.com lands in your Gmail inbox.
Verifying the Gmail Address
With email routing active, you can complete the Gmail setup:
- Go back to Gmail settings where you left off
- Gmail should have sent a verification code to your custom address
- Check your inbox for the code and enter it
You can now send and receive emails from your custom domain through Gmail.
Part 4: Sending from Multiple Addresses
Once your domain is verified with SES, you can send from any address at that domain. Want support@, hello@, and billing@? Just add each one in Gmail’s “Send mail as” settings using the same SMTP credentials.
For multiple domains, repeat the SES verification process for each domain. The same SMTP credentials work for all verified domains in your account.
Cost Breakdown
Sending (AWS SES):
- $0.10 per 1,000 emails
- Sending 1,000 emails/month = $0.10/month = $1.20/year
Receiving (Cloudflare Email Routing):
- Free
Total: Less than $2/year for most personal/small business use, compared to $72+/year for Google Workspace.
The only scenario where this doesn’t make sense is if you need shared mailboxes, calendars, or other collaboration features that come with Workspace/365. For individual email addresses on custom domains, this setup wins.
Troubleshooting
Emails going to spam:
Check your authentication with mail-tester.com. Send a test email to their address and they’ll score your setup. Common issues:
- Missing SPF record
- DKIM not verified yet
- No DMARC record
- “From” domain doesn’t match MAIL FROM domain
Gmail verification email not arriving:
Make sure Cloudflare Email Routing is active and your route is set up before triggering the Gmail verification. You can also check SES for any bounced emails.
SES still in sandbox:
You can only send to verified addresses while in sandbox. Either verify the test address or wait for production access approval.
Wrapping Up
Email hosting has become a commodity that providers charge premium prices for. But the underlying protocols are open standards and the infrastructure to run them costs almost nothing at small scale.
This setup gives you:
- Professional email addresses on your domain
- Full Gmail interface for reading and writing
- Proper authentication (DKIM, SPF, DMARC) for good deliverability
- Near-zero ongoing costs
The tradeoff is 30 minutes of initial setup and needing to manage DNS records yourself. For developers who already live in AWS and Cloudflare, that’s not much of a tradeoff at all.